
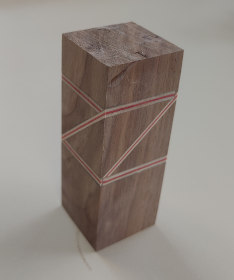
CandyCane Cue (Cue #2)
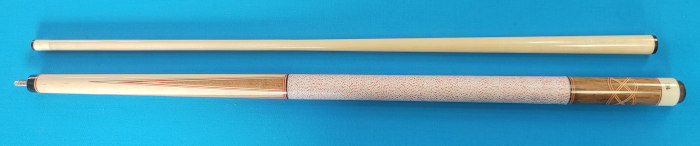
I build two cues in the fall of 2023. These were processed together but this one, dubbed the CandyCane Cue lead the way so is Cue #2.
The process followed is very close the The First Cue (Cue #1) with only minor changes to avoid some of the errors in #1.
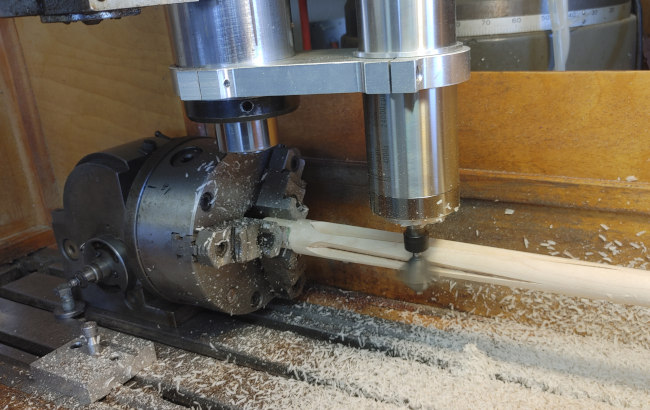
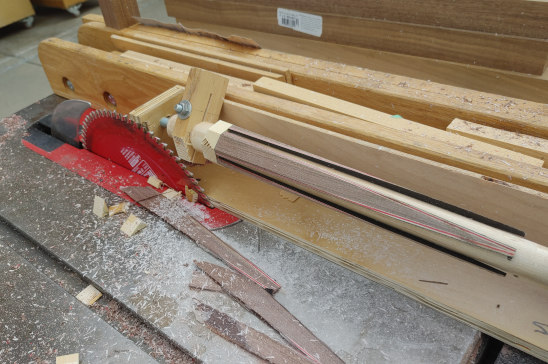
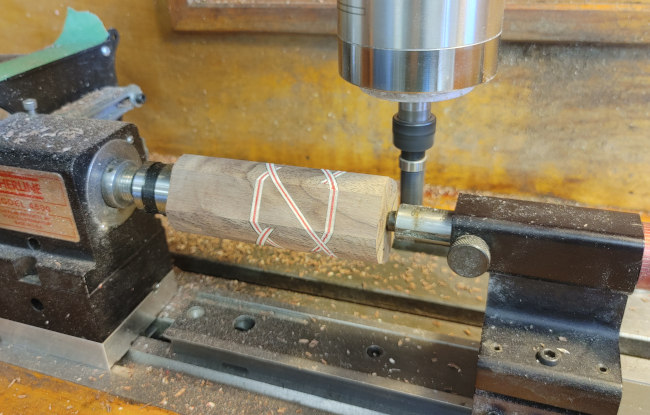
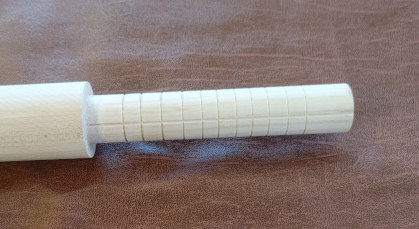
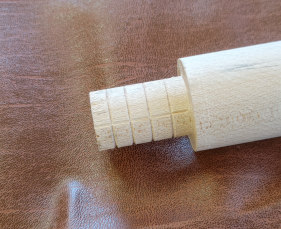
The forearm and point grooves were cut in the same manner as #1. The picture below shows this process with a V router cutter and dividing head. I did buy a high speed spindle, I've wanted to do this for some time but building cues was the final push to do it.
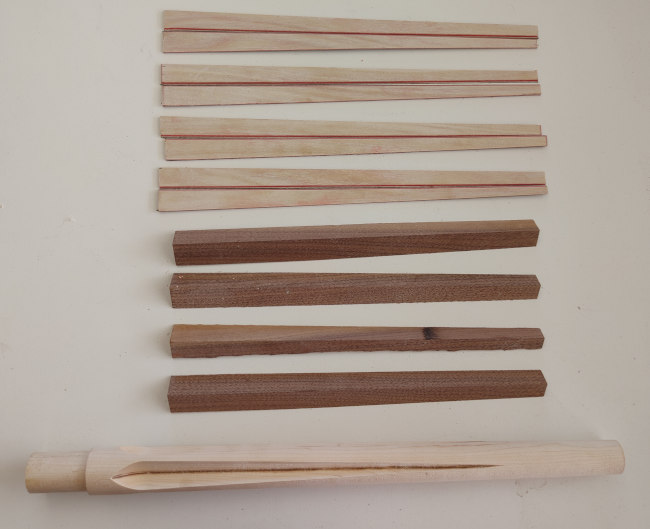
The material for the forearm includes the tapered maple forearm blank with V grooves for points, white and red veneers, along with wallnut point blanks. The veneers are layed up with West Epoxy and pressed between two aluminum plates.

 |
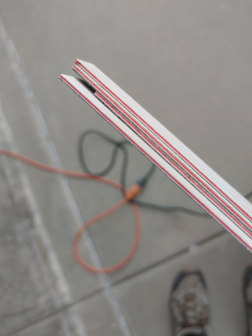 |
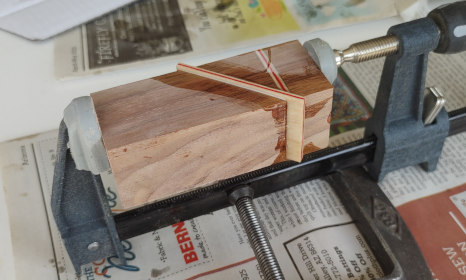
After laying up the veneer stack, tapered strips sized for the point layup were cut. These are tapered at 45 degrees so the individual veneers line up. All the parts for the forearm are shown below before they are assembled.
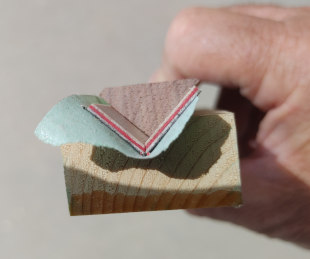
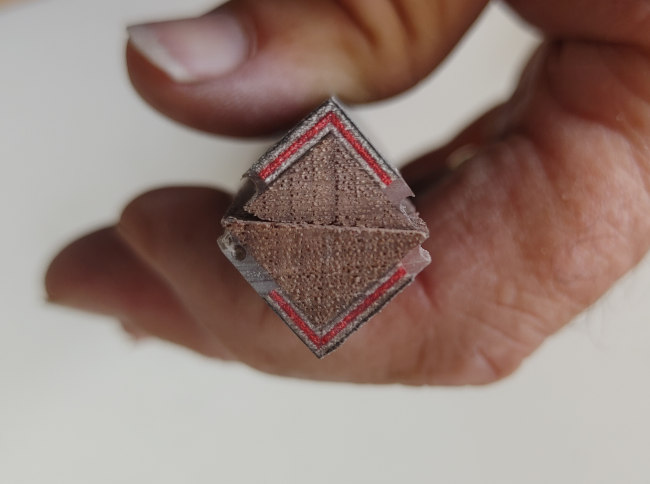
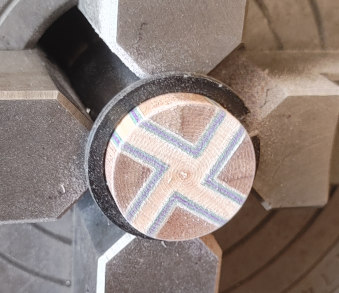
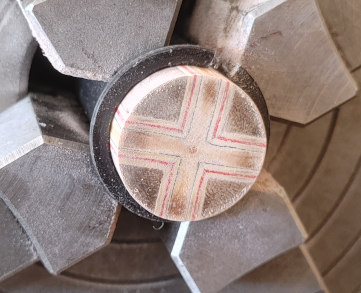
The point layup involved pressing the venners and wallnut point blanks into a 90 degree form. It's seen in the picture below that the veneers line up well.
 |
 |
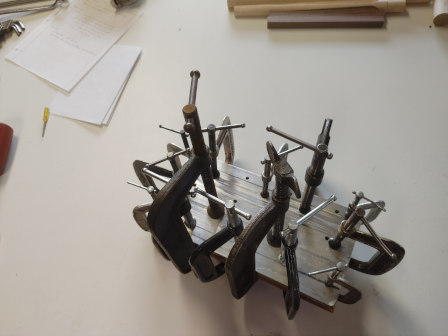
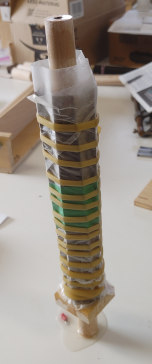
The points are glued to the forearm blank with West Epoxy. As is traditional, surgical tubing is used to press the assembly together while curing. I then used a jig on the table saw to rough trim the points. This worked well on Cue #1 and was carried over, it cuts down on lathe time.
 |
 |
 |
 |
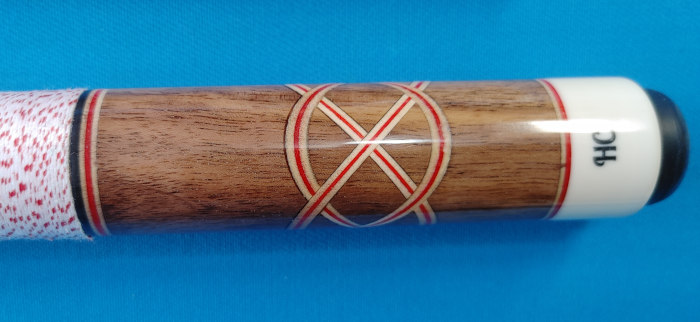
The butt sleeve was an Irish Knot using the same construction as Cue #1. The first pic shows the veneers layed into a slot in the square sleeve blank. 5 minute epoxy was used here. The next pic shows the blank sanded smooth with all the venners installed. Finally the blank is being turned round.
 |
 |
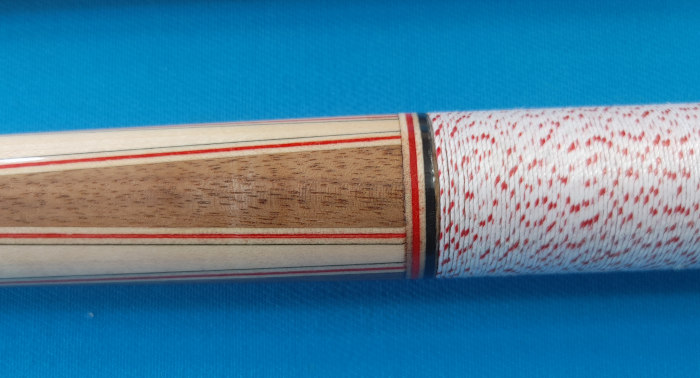
The handle was turned to size and cut on the ends for the butt sleeve and A-joint tennon. Grooves were cut for better glue retension.
 |
 |
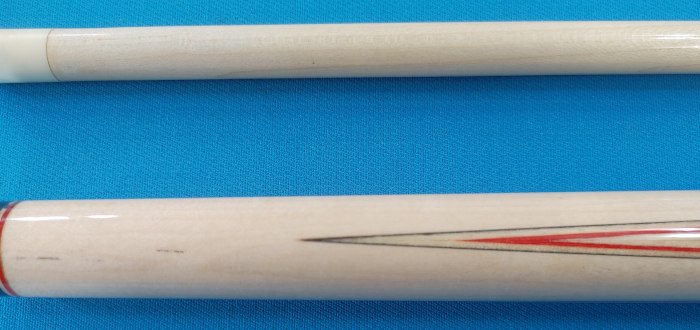
The CandyCane was meant to be a break cue so I made a shaft for it. This was from a hard rock maple blank, some 12.5 or 13mm pro-taper. I found it very difficult to cut a consistent taper on my machine. I need to cut half the shaft, then flip it end for end and cut the other half. Impossible for me to line up the two cuts. I need a longer travel to do the cut in one setup. Expensive for only doing cues as a hobby.
Overall I'm happy with the results. The points are much more crisp than in Cue #1. I'm not a big fan of the wider veneers, but that's just personal preception.The Irish Knot in the butt sleeve came out well. However you can see a glue line at some points around it's joints. Very hard to match the table saw cut width and veneer layup thikness. The outside veneer on Cue #1 was dark so this glue line wasn't evindent. It can't be seen in these pictures but the points do not line up well, different lengths. When the cue was assembled it turned out to be un-straight. The final cut bought it into straightness but as more material was cut off one side than the other the points came out uneven. A few tens of thousands is all it took. I believe this is due to the screw in the A-joint bottoming out before the faces seated together. I will check this on the dry layup before commiting to glue on future cues.
I added my initials in the butt cap. You'll have to see the Gecko Cue build (Cue #3) to see how that was done.
All in all I'm pleased with this cue and use it as a break cue. Again, I have limited skills in this sport, but for me this cue plays well.
Cues : Main Page Gecko (Cue #3)