
Changes/Repairs - Shasta Renovation
 |
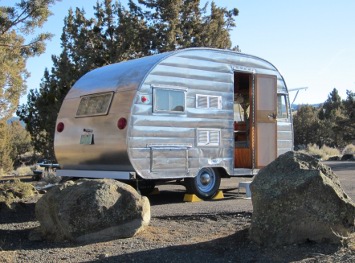 |
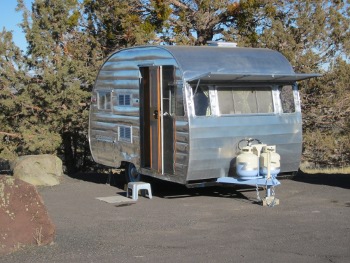
We took Shasta Lodge (The Wingless Wonder) to Lava Beds National Monument in February 2013. It was her first outing after renovation without hookups. She was looking fine as seen above. The battery system worked flawlessly and our two dogs, Ruby and Cooper, started to get the hang of this new camping mode.
The only problem we found was a leak in the water tank. Thus:
New Water System
The tank was leaking where the inlet spout attaches to the tank. I thought this might be a problem. It is a 1" pipe though the wall and into a plastic water tank. The tank wall isn't flat to the wall making attachment difficult. Also, I found it impossible to thread the pipe into the tank without cross threading it. Not sure why, but I wasn't capable.
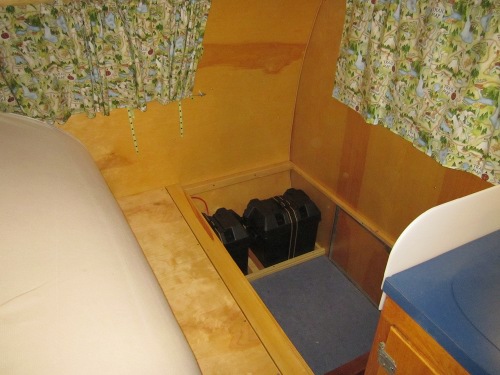
I really like the concept of this gravity feed water tank, real simple. However, it does put the tank towards the top of the trailer, top heavy. I also found, after the renovation, that Shasta was tongue heavy. So, after considerable thought, I decided to move the two deep cycle batteries from the street side dinette bench to the rear most point under the bed. This would take weight off the tongue and leave room under the dinette for a 10 gal water tank. Moving the water tank also frees up the cabinet over the sink as premium storage space.
So, I moved the batteries.
 |
And added a 10 gallon tank under the dinette.
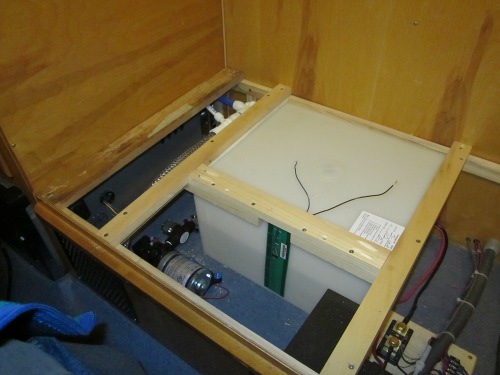 |
I just couldn't get gravity feed to work with the tank being below the sink. So a Sure-Flo pump was put in. The plumbing is shown below.
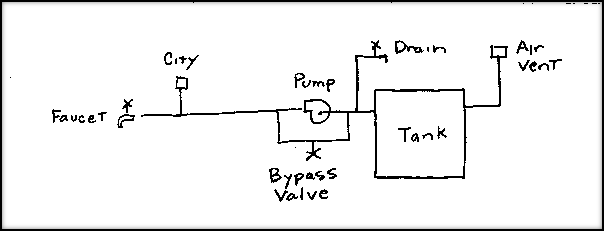 |
A very standard system but for the bypass valve. If city water is connected and the bypass valve is opened water will flow into the tank. The valve is only used for filling the tank from city water. I liked this idea better than putting a fill hole through the side of the trailer. Even more so, it would have been tricky to put a fill valve into the tank under the dinette. I can't see us filling the tank from a bucket, so this city water fill should work well. An air vent is brought outside the trailer near the sink, through the plate with the city water hookup and gray water drain. If the tank is overfilled, it will simply spill out this air vent. We haven't yet traveled with the system but have tried it in the driveway where is seemed to work well. It fills much faster than through a spout using a hose.
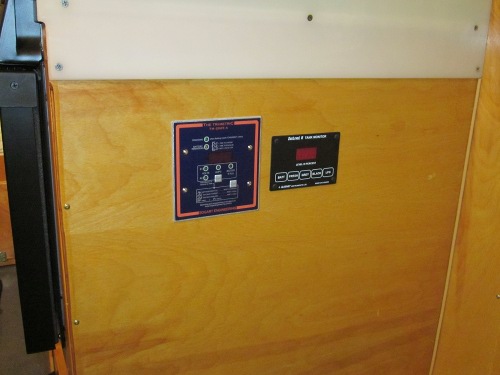
Since the tank is now under the dinette out of sight, I put a water level gage on it. The gage I picked is from SeeLevel. After hooking it up it seems to work well in the driveway. The sensor can be seen above attached to the tank. The readout is shown below next to the battery monitor. More technology than we can handle!
 |
And finally, we gained some nice storage space in the cabinet above the sink.
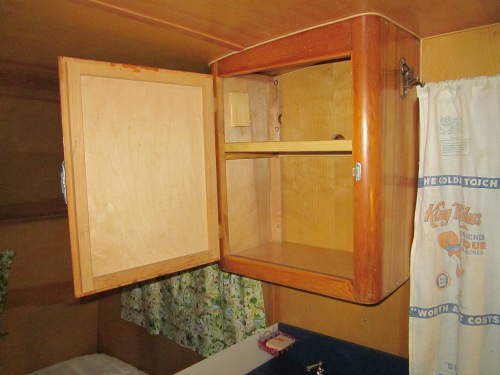 |
If I'd only known what was to be when I was re-building that cabinet, I'd have been more careful with the finishing touches inside. "Don't worry, it'll be covered up with the water tank."
That should get on the road for some Great Adventures. I was done before, and the new water system is a repair, but thought you might like to see it.
HAPPY TRAILS