
September 2012 - Shasta Renovation
More progress this month. Was hoping to have it on the road the end of September but this didn't happen.
Interior:
I decided to finish off the interior before moving to insulation and putting the skin back on. The "finished" kitchen is shown below.
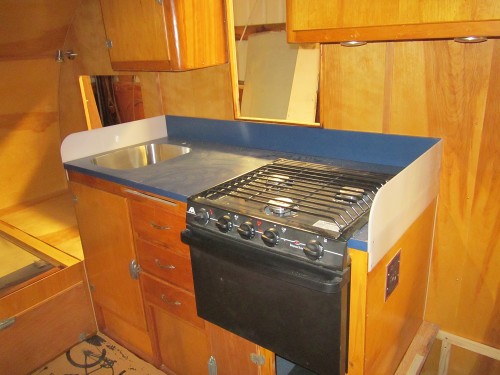
I cut some Plexiglass for splash guards on the end of the kitchen counter. These seem large but are the same size as the original. A back-splash of the same material as the counter top was added. I didn't want to screw this in from the outside and finally just glued the back-splash in place.
The small door under the stove and the one under the bed are new. After stain and polyurethane they match the rest of the interior well.
Plumbing will need to be added once the wall skin is in place. A previous owner plumbed the city water and drain through the wall, but not very well. I need to use the existing holes in the skin as I can with new plumbing.
I built a new self over the foot of the bed, curb side. We've never used the hammock bed and decided additional storage was more important.
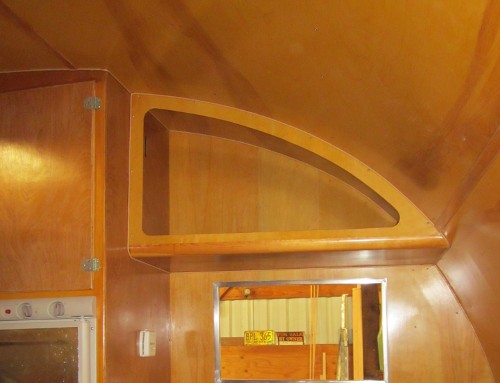
Construction was fairly straight forward. The hardest part was the bottom rounded molding. I did want this feature since it matches the shelf over the dinette and gives the vintage Shasta feel. After considerable thought I bought a 1 1/4" corner rounding router bit. Expensive but by far the easiest way to get this molding. Shasta used 1 1/2" corners but the 1 1/2" bit is noticeably costlier than 1 1/4" and I'm sure no-one will ever notice the difference. I used 1/4" birch plywood for the base and 1/8" birch for the facing. I routed rabbits for the plywood to be flush with the molding.
I cut the top frame and fit it to the ceiling. I then built up the front frame with an opening the size of the plywood facing, fit the facing and routed this facing to the frame. Finally, I cut the framing back some 3/4" leaving the opening 1/8" birch ply.
I do like the way this new shelf came out.
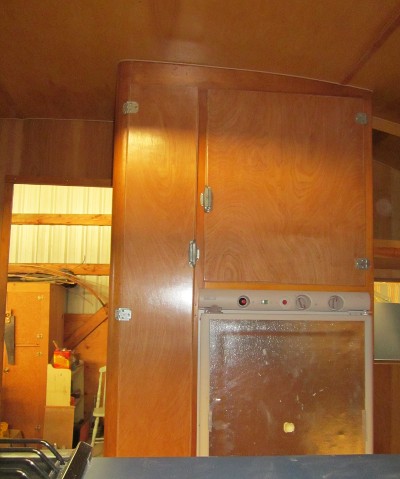
The new doors on the closet have been finished. The picture below shows that they match the other woodwork well. There is a face to go on the refrigerator but I'm waiting to put this on, less chance of scratching it.
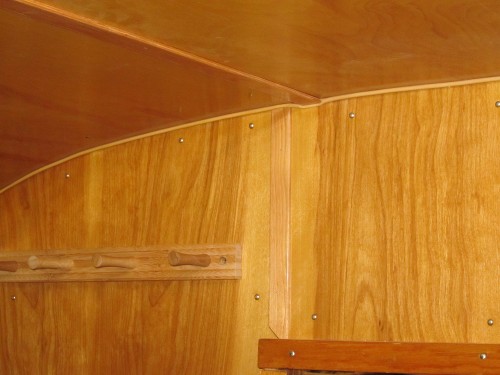
Finally, I planed some solid birch to 1" x 1/8" for ceiling and wall molding. These cover the joints where plywood panels join. Shasta used 1" strips of plywood and I couldn't bring myself to go this cheap. The below is a shot of the trim above the door.
Insulation:
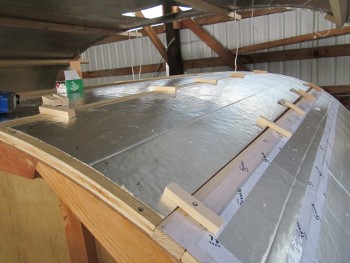
I decided some time ago to use rigid foam insulation. I had to special order 3/4" thickness and obtained enough for the trailer. I was ahead of myself so these have been sitting around for a year or two. Way too optimistic regarding my progress!
I cut sections of foam some 4" wide to fit the curve of the roof. This worked OK but I then hit on the idea of cutting a kerf on the inside of the foam.
I cut the kerfs with a router table. I finished almost all the insulation before realizing a table saw would do a better job more easily. Oh well, if I'm ever crazy enough to do another trailer I'll be set.
I had to use a small amount of glue to hold the more tightly bent insulation in place. I tried contact cement but settled on construction glue (liquid nails). I used simple wood "clamps" to hold everything in place while the glue set.
 |
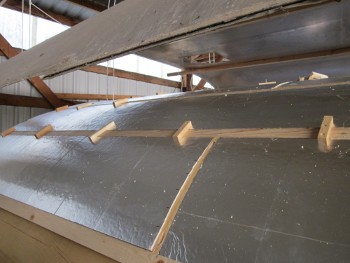 |
I'm probably showing a bit of OCD but I routed the back of the foam for wires. This allowed the insulation to sit fully into the framing. May not be necessary but I liked the results better than not doing it. The final results should work well.
 |
 |
I've closed in much of the back.
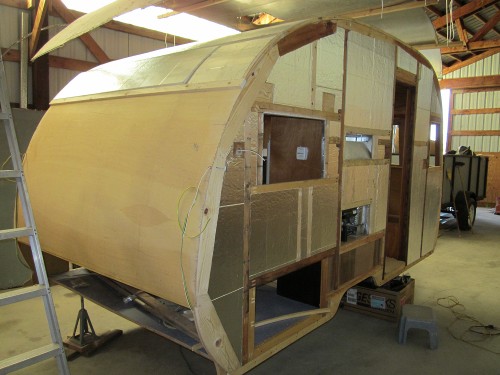
I need to re-install the roof before completing the framing and insulation in the back. I'm not sure where the skin ends above the rear window and the easiest way to get it right is to put the roof in place, then frame.
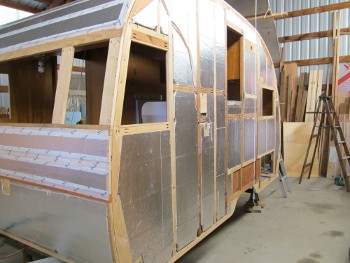
Aluminum Skin:
The original front skin has some holes and it pretty banged up. I found a local sheet metal shop that can put in 6" breaks using a manual break. I've ordered new aluminum for the front.
In fact I ordered two 4'x8' sheets of 0.032" aluminum. This should be enough to remake the lower back also. The rear section of our 1955 has no 6" breaks in the back, it's just smooth. Well, the original is pretty bent up. I'll likely leave the new rear skin smooth.
There may be just enough aluminum to remake the strips beside the windows on the front and back. The local sheet metal shop has a machine to do the Pittsburgh lock needed to match these to the lower skin. It gives a 1/4" seam rather than the original 1/2" but that'll work well. If it all works out I'll leave about 1/2" extra width on each side of all these pieces and fold it over. This will much better waterproof these seams. The ceiling was done this way and hasn't leaked, the corners weren't and leaded a lot. I doubt we'll have trouble for 20-30 years and beyond that we won't care. But whoever gets it next might.
Hopefully we can be on the road by the end of October.