
July 2009 - Shasta Renovation
Tear Down
We knew there was a good bit of wood rot since the corners were coming apart. There was also damage around most of the windows and around the overhead vent. So how to go about this first restoration? Just start taking it apart and see where the damage is and how it was put together, I guess?
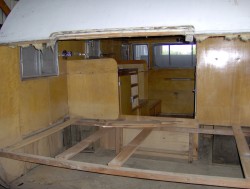
It was decided to first open up the back so the cabinets could be taken out. Seemed like a good starting place since we know we'll have to replace the flooring. The cabinets certainly won't come out the very narrow door. So we took out a lot of skin screws, a lot of nails and the rear window. This allowed the AL skin to be pulled up as well as the birch plywood. But the birch plywood was so bad we knew it was slated for replacement. Also the AL skin came apart into three pieces, one large and two from the sides of the rear window. Thought the seams were solid but the skin slides in and out of a tongue & grove. Anyway the back was opened up.
 |
 |
Once the back was open we pulled out all the internal cabinets which came to the floor and pulled up the linolium.
Installation of the cabinets is curious. They are screwed to the floor and the walls from the inside, but also screwed through the walls from the outside. At the ceiling they are likewise swrewed from the outside. This does make them hard to get loose.
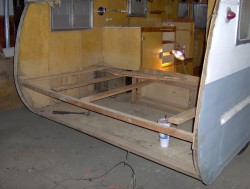
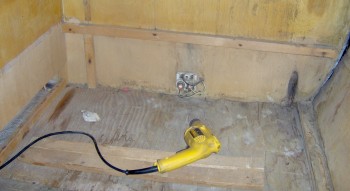
The flooring was bad in several places, including the front left which is shown below. So we'd decided to pull up the floor for replacement. The right hand picture shows the state after pulling the floor.
 |
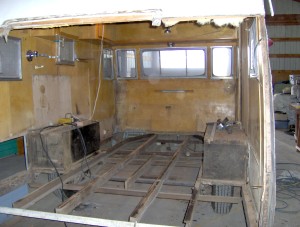 |
We're starting to get an idea how these are put together. The floor is supported on the steel trailer frame and on planed 2x4s resting on the frame. It's held to the 2x4s by a large number of nails. But it's mainly held down with carriage bolts through the floor, 2x4 and frame. The flooring is made up of two layers, 3/8" plywood on top and a 1/2" composite board underneath. The composite board has what seems to be a tar base. Ours needs replacement but held up well for a 1955 composite board. The joints between plywood were heavily stapled and/or supported from underneath with loose 2x4s with both pieces of plywood nailed to this.
The front and back aluminum skins butt the side skins at 90 degrees. It appears they were kept in place with small nails during assembly. Then an L section trim piece overlapped both skins some 3/4" to 1", was sealed, and screwed from the front or back (not side), through a 3/4"x3/4" offset, into 1x2 wood framing. The top skin is different though. It seems to curve over the side skins some 1/4". The skins are sealed and a trim piece is screwed in from the side. We haven't taken the top off yet so may revise and expand this thinking when/if we do.
The structure is aluminum skin, 1x2 wood framing, and 1/4" birch plywood on the inside. That leaves 3/4" for insulation. I found no insulation in the back from the window down, but some fiberglass from the window up. In the corners the ceiling birch plywood extends out to the side skins and goes over the framing. A 3/4"x3/4" strip of plywood was placed over the birch against which the back skin sits. This was all held in place by screws through the trim, rear skin, 3/4"x3/4" plywood strip, birch ply, and into 1x2 framing.
Note that the ceiling birch ply runs over the side birch and out to the side skin. To replace it in the same manner will require pulling the roof and ceiling framing. That sounds like a pain but might need to be done.
So far it looks like they started with the steel frame and floor. Then installed what cabinetry attaches to the floor. The walls were built up and put onto the sides being screwed and nailed to the outside 2x4s under the floor. Then the ceiling birch was put on and the ceiling framing applied. Finally the ceiling skins and front/back skins were put on. Once on the skins were probably cut for windows and doors.
If anyone can confirm this let me know. If you have any additional details or corrections please also let me know, it would made this restoration go a lot smoother. And if you've read this far I know you've been inside the walls or at least thought about it. Thanks.