Ziggy - Twin Beds
We were initially interested in a Pleasureway Excel TD, which has twin beds. But had a chance to buy Ziggy, a 2020 Pleasureway Excel TS. We thought we'd need to change the "bedroom" layout to twin beds and figured we know how to if needed. Out first trip to Bonita CG for 3-4 days convinced us the change was necessary. We delayed some time on this project to verify the WeldTec Lift would improve the handling to at least an acceptable level. However, that was delayed again and again so it was decided to go ahead with the twin bed conversion.
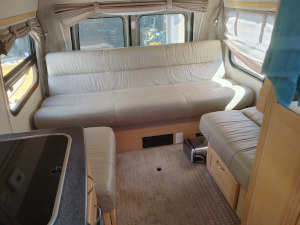
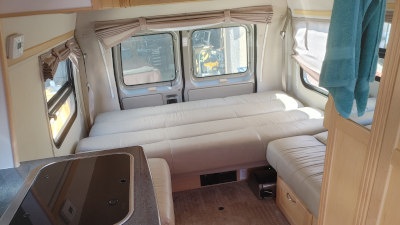
The original configuration was an electric couch that went up for day use and folded down for use as a bed.
 |
 |
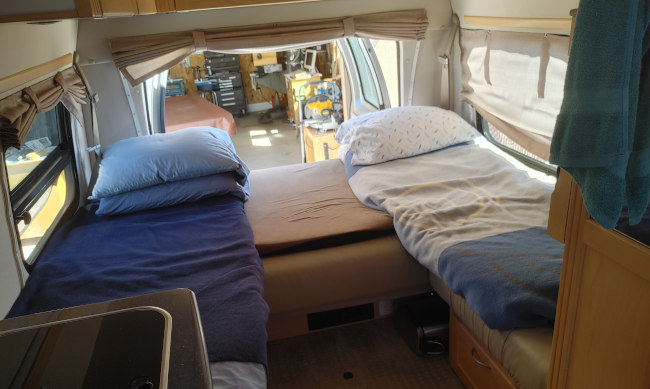
A design was developed for a twin bed layout.
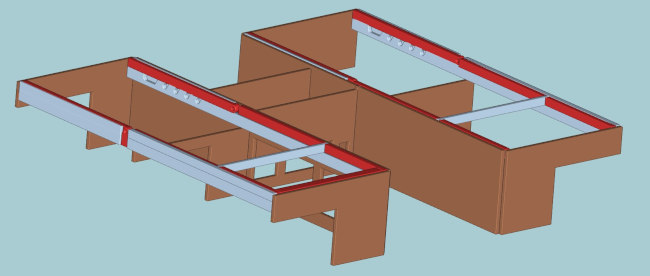
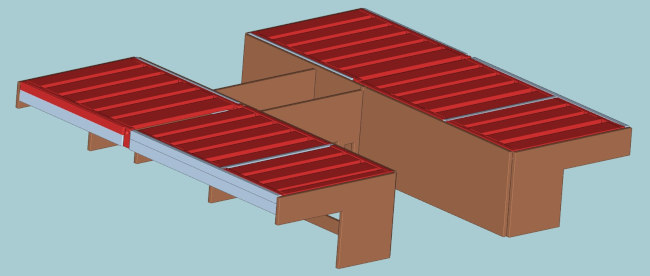
The structure is similar to the original PW with the lower cabinets in 3/4" plywood. It follows the original fairly closely. The cabinets were extended to make the beds a little wider, 28", and they are higher than the original to accomodate the anticipated thinner mattresses. The beds are based on a chaise beach lounge, the upper portion can be raised in increments. In fact I purchased a set of plans from House of Handmade for such a lounge. All the dimensions were changed except for the tilting mechanism. It uses slats to support the matresses as the lounge does.
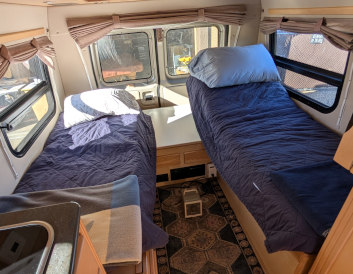
"Well heck, you just built a poor replacement for the nice electric couch. What the heck?" Ya kinda. The original was a nice adjustable couch that could be made into an uncomfortable bed (think sofa bed). The new configuration gives two nice twin beds with the option of tilting the back up. They can be left made up as beds while still sitting at the table or relaxing on the lounge. Bonus, you feel like you're at the beach.
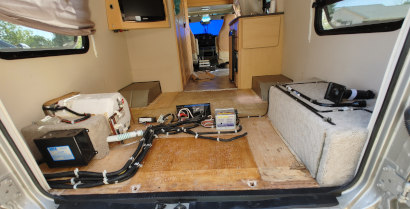
The conversion started by taking out the couch and related lower cabinets. The old carpet was a must go, but I left it over the water heater and storage compartment.
 |
 |
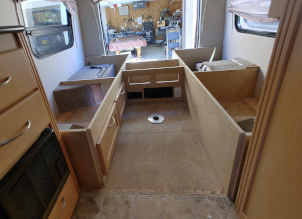
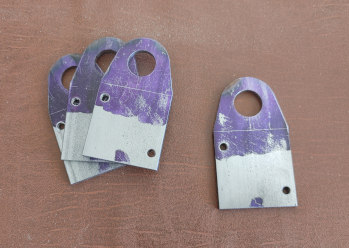
Then, the plywood framework was cut and installed according to the plan above. That sounds so simple but a lot of thought and measuring were involved. The framework is held together and to the floor with small L brackets salvaged from the original. It was magic, when done I had one L bracket left over. Makes one feel like they are on the right path hu.
 |
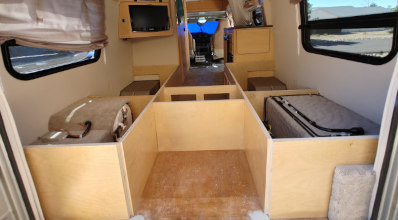 |
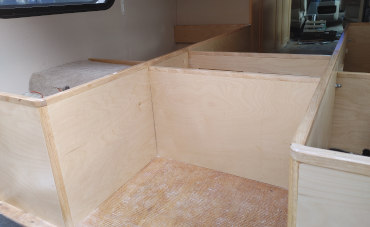
The bare plywood edges were trimmed with strips of birch. after sitting on the framework, testing, it was decided to raise the beds, and thus table seating, by 3/4". Thus, the birch trim is that thick.
 |
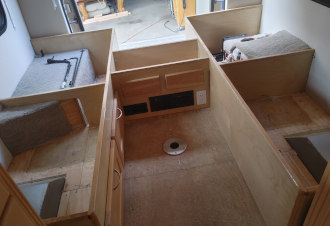 |
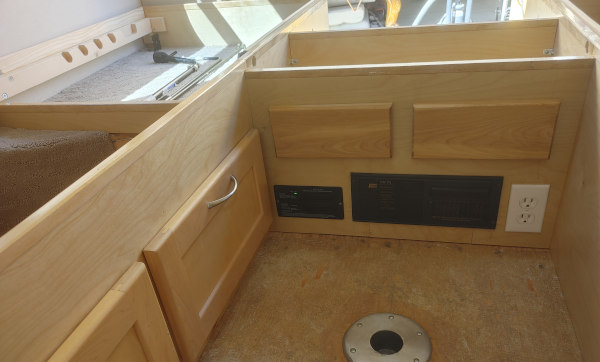
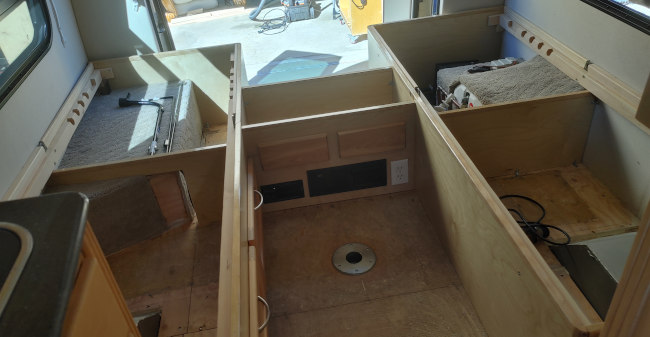
The fuse/relay box, CO2 detector and electrical outlet that were on the central wall were moved inward and kept on this wall. The rectangular holes, seen above, will eventually be drawers. Below the drawer fronts are mocked up in place. The drawers will be installed after the new electrical system is configured. The drivers side panel has no cutouts for the same reason, it will depend on the electrical which is likely to go behind this wall. Originally there were pull down cabinet doors, one on the passengers side and one on the drivers. I reused both doors on the passengers side as can be seen.
 |
 |
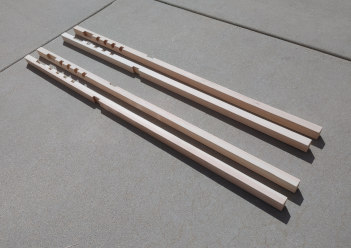
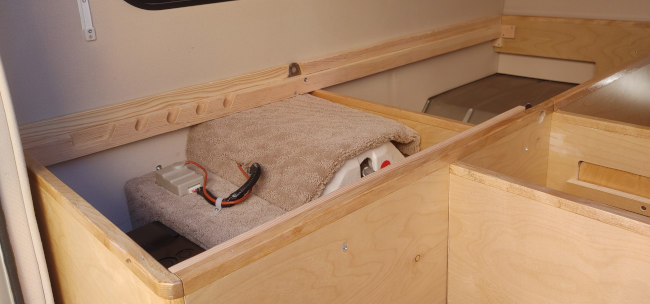
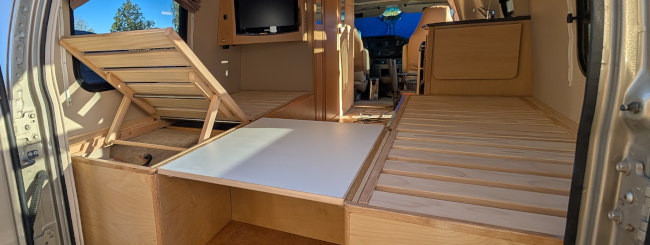
The bed rails are mounted to the framework as below. The inside rails are screwed to the plywood walls while the outside rails are self supporting. The PW walls are not structurally sound enough for attachment. The rails are supported with blocks at their ends, and the central plywood wall. The lower blocks are to be glued in place while the side blocks are removable. That allows the rails to be removed if needed. One can see the hinge supports peaking up.
That's all great but the &%*&1^* designer forgot about the inward tilt of the walls. So, the tilting portion of the bed hit the sides of the PW as they were raised. But, the ingeneous and talented fabricator added a 3/4" board between the bed rails and the wall. That gave just enough room on the passengers side. On the drivers side a small cut was made later which solved the last interference problem. Almost, on the drivers side the tilting frame hit the window crank. This was anticipated with the solution being to take the handle off and push it back on when operating the window. Whew!
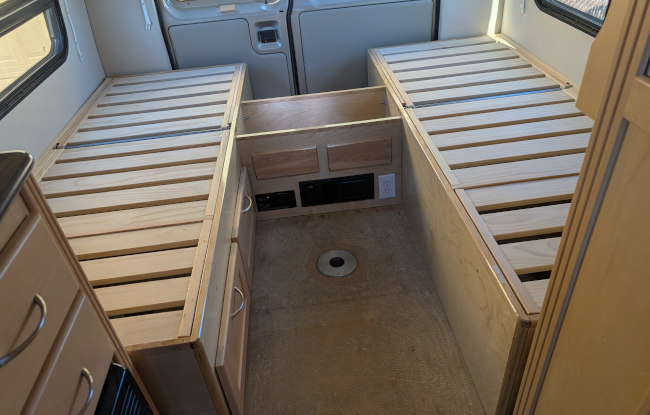
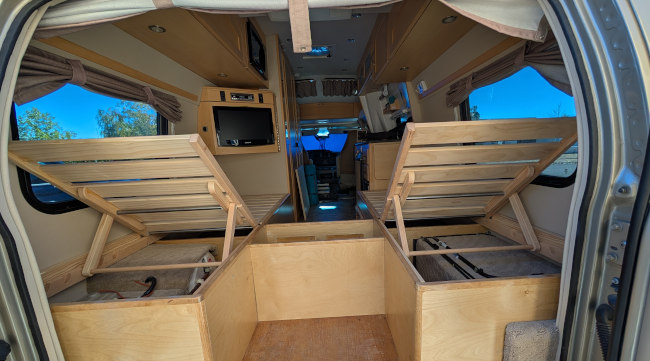
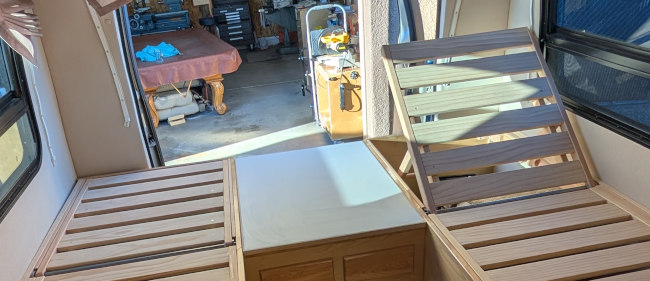
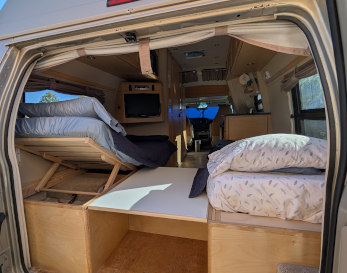
The bed frame was made with slats as a beach lounge should be. The slats were held to the outer rails with woodworking buiskets and glue. These fit on the bedrails giving a nice flat supports for mattresses. These bed frames were made in three parts. The top tilts for the lounge part, the center sections is to be hinged at the bed rails totilt back for storage access, and the bottom sections which are removable. The initial concept had the middle and bottom sections as one hinged part. However, if this was done the section would not hinge but hit the TV cabinet on the drivers side and the folding table on the passengers. Thus three sections.
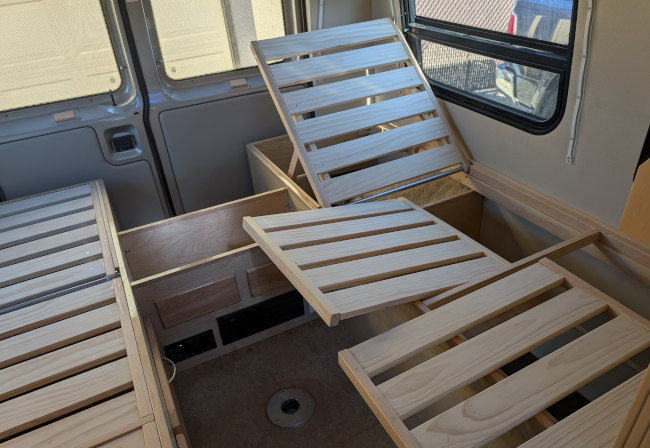
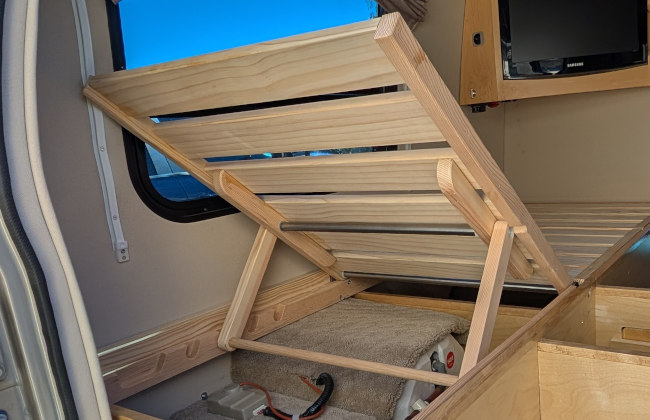
The top bed frame tilts in the same manner as a beach lounge. The pictures below show how the mechanism works. Fairly simple, just like a beach lounge should be.
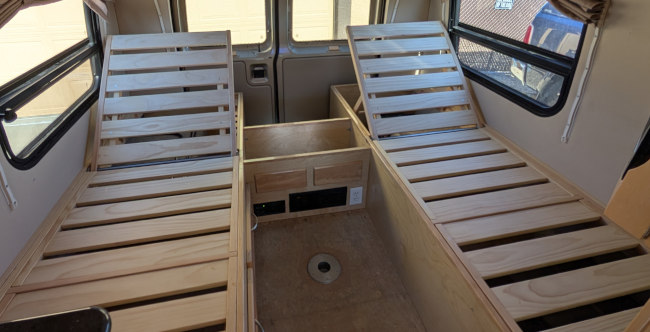
A simple night stand was mounted between the beds. This may change but for now it's a simple solution. We'll have to use it before deciding what it needs to be. Maybe built up with a drawer or two. Just don't know yet.
And finally with the bedding in place.
 |
 |
It does need to come apart for the wood to be finished. Likely take a couple of short trips to see if any changes need to be made first. Hopefully be completely finished with this phase by the end of 2024. Stay tuned.
