Ziggy - Solar
The solar system is part of the electrical system, but that section was getting long already so solar has it's own chapter.
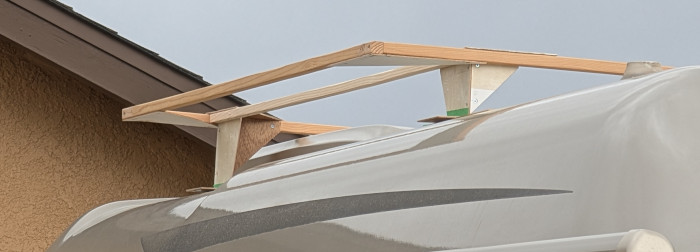
The specifications from the load analysis showed we needs at least 400w of solar. It is hard, if not impossible, to install over 400w solar on our Excel TS without extending over the air conditioner. After considerable thought I decided to build a rack that does extending over the A/C. This is not unique, I know of three other Pleasure-Ways that have mounted solar panels in this manner. While not a large number it proves it can be done. There are no commercial racks that are tall enough to go over the A/C and accomodate the Excel's curved roof. So, after gathering as much info as I could I continued with my own rack design.
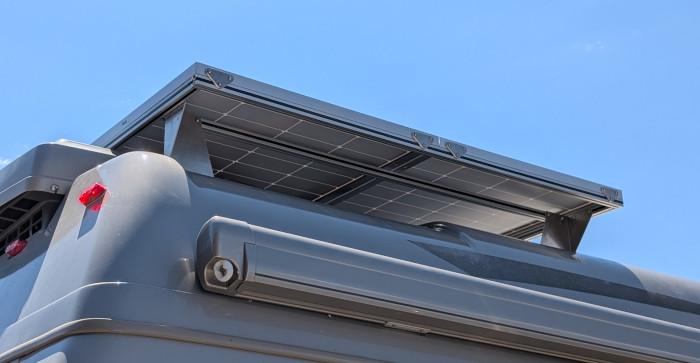
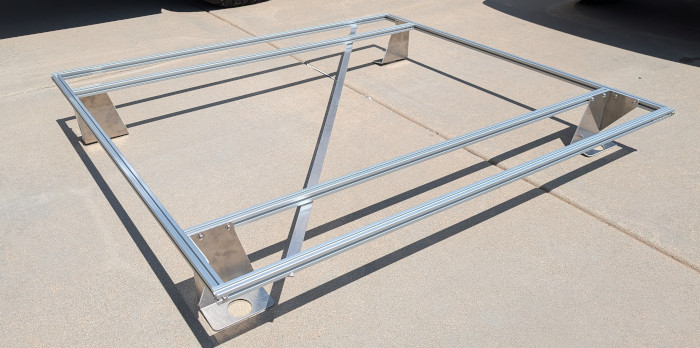
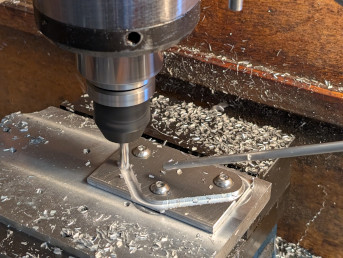
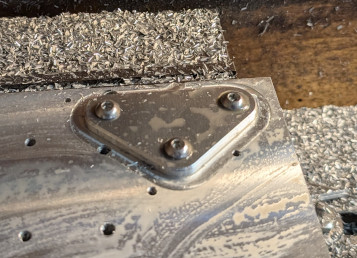
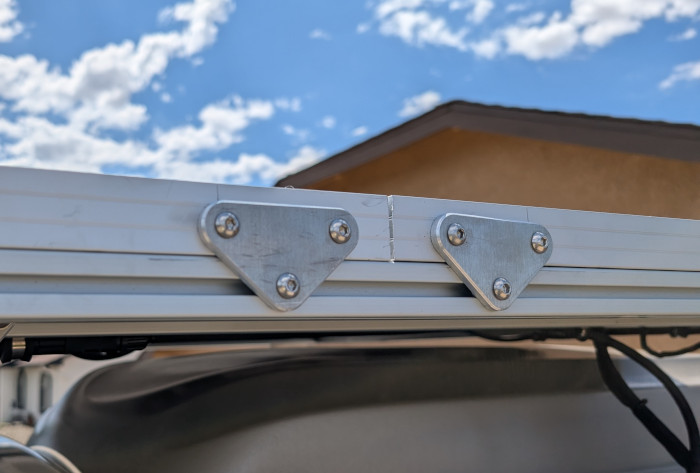
The CAD drawing below shows the final design. It will accomoadate two 220w Rich Solar panels. The frame is built using 1" 80-20 aluminum extrusions, while the feet are 1/8" aluminum. The initial design had the feet on the outer corners without the inside support bars. This put the feet far enough outboard that roof curvature became a real problem. Thus the legs are now 8" inboard attached to the now included support bars. The feet are bent to give triangulation both side-to-side and front-to-back.
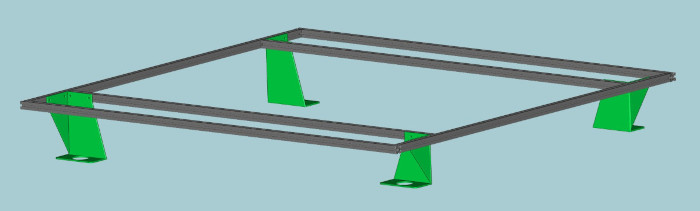
The picture below shows the final rack on the ground. The legs were laser cut and bent by a shop in Prescott, AZ. That was so much easier than my trying to do it, particularly since I don't have a sheet metal brake. Extra credit for at least one good choice. The cross brace is to keep the rack square while moving it around.
A real problem was how to attach the rack to the roof. I wanted to avoid drilling holes in the roof. Besides, without taking the interior apart to get at the fiberglass roof from the inside, attachment is still difficult. I considered using 3M VHB tape which on paper looks fine on large footprint legs. The Internet quotes many people saying this is a terrible idea, don't do it. OpenAI summarized this option with "VHB tape is not recommended as the sole means of attaching a roof rack". Chris Topher (PW Facebood Group) has gone through this process and suggested ClickBond studs rather than VHB tape. After review, they look like a very good solution. I ran some aerodynamic calculations assuming the panels act as a thin flat plate (40 degree angle of attack at 40 mph which I figured was about the worst). This gave a lifting force on the front (upwind) legs under 100 lb each. I believe with my four 3" x 6" feet either VHB tape or one ClickBond stud on each leg would be adequate. This does assume the VHB tape is in contact over the whole foot though, which is hard to assure with the curved roof. I finally decided to use one ClickBond stud on each foot along with a layer of VHB tape. Reduncancy seemed like a good idea. (OpenAI agreed. But then it was dead wrong on several go rounds calculating aerodynamic loads.)
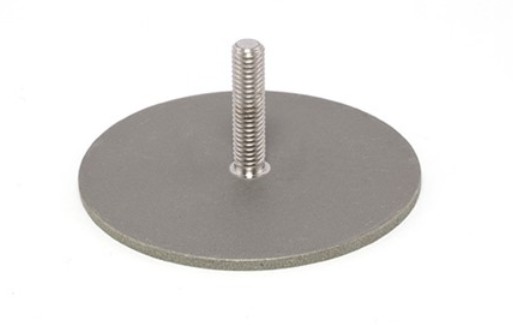
The ClickBond studs have a base a touch 0.20" high. An image, from ClickBonds website, is below. I want the foot to sit down on the roof for better load distribution and effectiveness of the VHB tape.
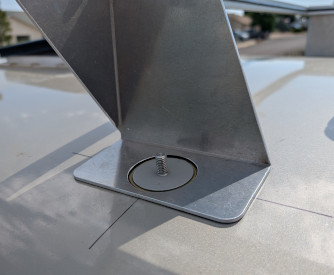
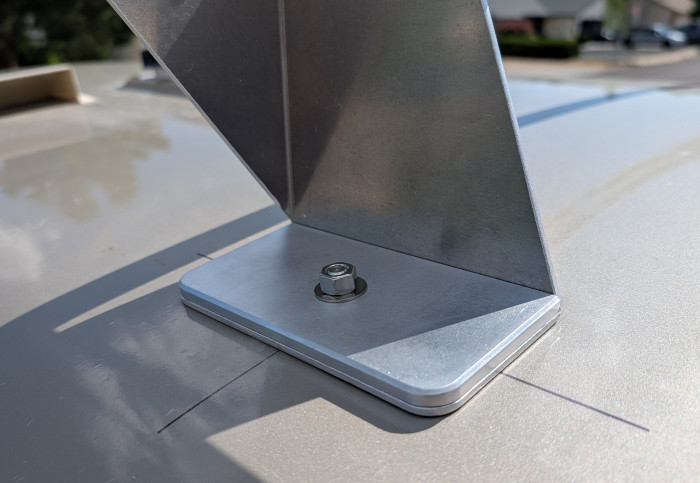
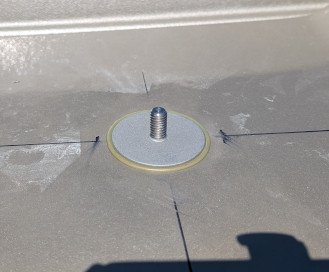
To get around this I put a large hole in each foot for the ClickBond stud to fit up into. These holes can be seen in the rack images above. A picture of one foot set over an installed stud is below. A plate was then fit on top of the foot with a small hole for the threaded stud. As above the stud base is 0.2" thick while the aluminum for legs is only 1/8" (0.125"). To have the plate compress the foot to the roof, with standwitched VHB tape, a recess was needed in the plates. The final plates are shown below. The assembled configuration with the plate and compression nut is shown below.
 |
 |
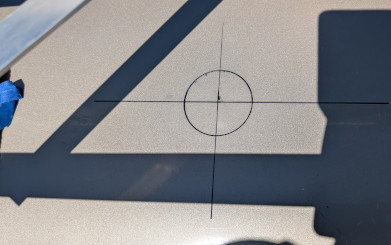
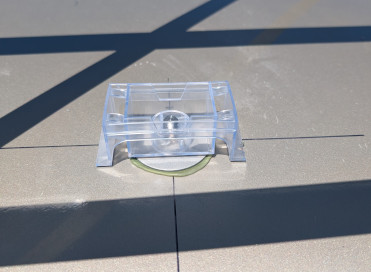
The ClickBond studs are a pretty slick item. Expensive but slick. Originally developed for aerospace applications they carry their sticker price through to other applicaitons. The process is shown below. I carefully marked the location and roughed up the surface and carefully cleaned the contact area. The studs come with their own disposable plastic application fixture. The two part adhesive is applied to the base of a cleaned stud. The sticky tape on the wings of the fixture are pressed to the surface. Once in position the stud is pushed down until it "clicks" into place. This gives even and consistent pressure over the base while the adhesive cures. The plastic fixture is then removed and discarded. Easy peasy.
 |
 |
 |
 |
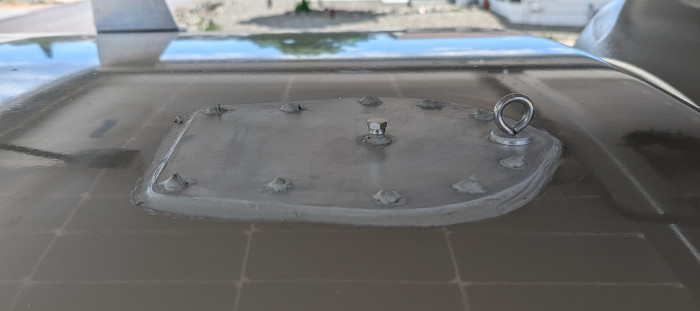
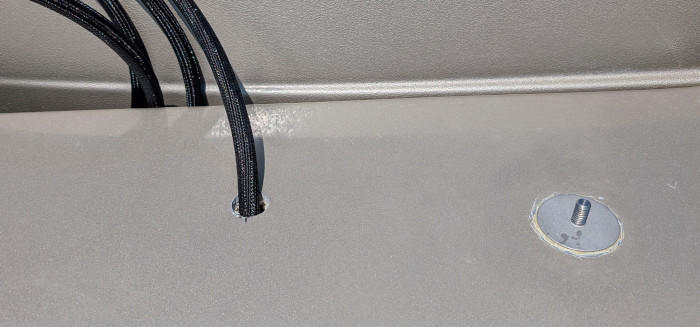
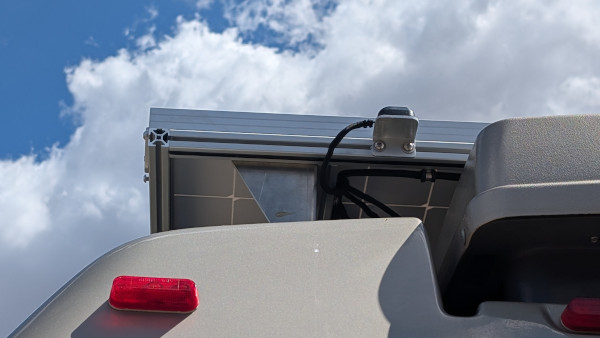
I really wanted to bring the solar wires through the TV antenna opening. For the rack to fit, the TV antenna was removed anyway. I wanted to use it's opening for wiring rather than drill a new hole. I was counting on this. But fate stepped in. Once I removed the antenna I could not feed wires the 8" from the antenna hole to the adjacent cabinet. I now believe there's steel and wood structure inbetween. I made a cap to fit over the gaping antenna hole, as shown. I mounted a coax-cable receptical so a new after market TV antenna can be added if desired. The eyebolt also mounted in the cover is for a teather tied to the rack, a second redundancy. So, rather than tear the roof apart I decided to drill a new 1" hole for a solar gland. This was in the rear corner on the drives side where the solar wires come up from the electronics. The hole with solar wires fed through is shown below.
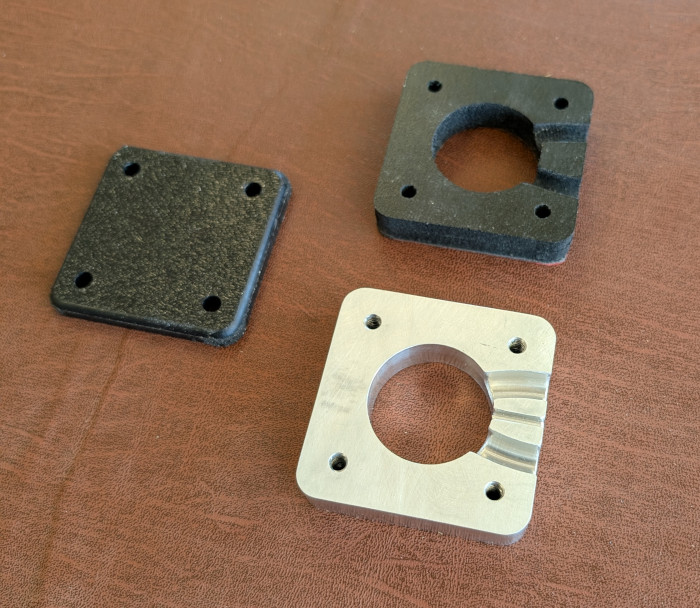
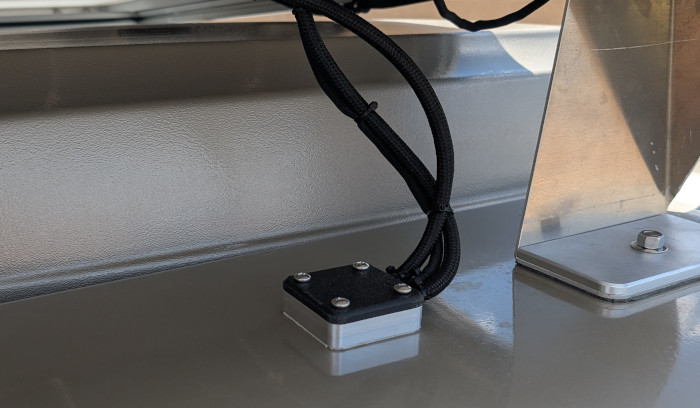
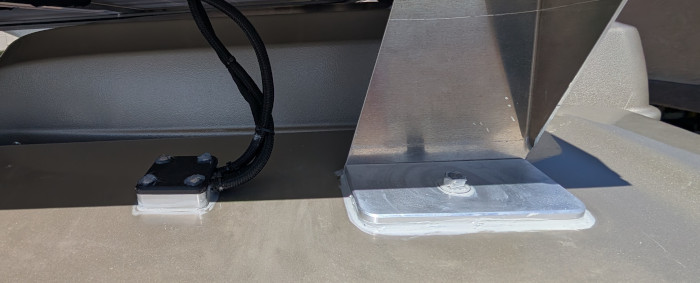
I needed a solar gland to prevent water getting into the roof though this new hole. Typical glands have space for two solar wires. This would work but I also wanted to feed a SiriumXM antenna through. Many people advise use of a plastic sealed box over the hole with glands mounted into the sides of the box. The main advantage is adding wires is "easily" done. I've used this before but for this applicaiton it seemed to be very large and bulky. I finally settled on a solar gland from DIYvan. It's about 5/8" thick and 2.25" square. A nicely small package. When I received my order from them I found a few problems, some I knew of and others not. Their gland uses VHB tape to hold it to the roof but also wants four more screws through the roof. I did not want four more holes and figured the VHB tape would be fine. The lower portion of their gland seems to be 3D printed. That's fine but I quesion if the material will hold threads. I planned to put threaded screws into it rather than extend those screws into the roof. I considered putting threaded inserts into this part but did not know how well they could be bonded to this unknown material. So, final analysis I made a new lower gland section from aluminum. Could have gone with black nylon to match, but did not know if the VHB would stick to it. Thus aluminum. The new and old parts are shown below. Also the installed gland, still needs sealing and caulking in this picture but it does show the final configuration.
The solar panels need to be held down to the 80--20 rails. I did this with 10 tabs, five for each panel. The picture below shows a tab being processed. The top two holes are bolted to the side of the panel. The lower hole is then fixed to the 80-20 extrussion with T-nut and screw. These, and all other screws used, are fixed with blue Locktite.
 |
 |
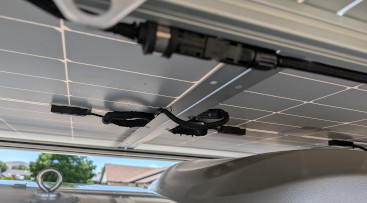
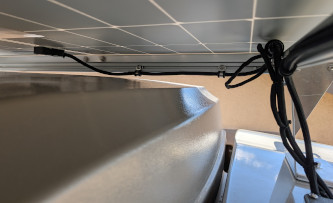
So far so good, just need to wire the panels. Not difficult but tedious. Wires were encased in woven loom to protect them, and routed along the 80-20 rack stringers. A few pictures below show the idea. The wiring is tucked up behind the 80-20 to protect them and to make taking pictures very difficult.
 |
 |
Finally, a small stand was attached for the SiriusXM antenna.
The "coup de grace" was to caulk the solar gland and rack feet. If the gland leaks it comes into the coach, not good. There are no holes at the feet so it won't get into the coach. However, I'm not sure how VHB handles water so I caulked the feet also. And the very last thing was to add trim to the 80-20 T-slots. (pic at top of page).
This has taken way longer that I anticipated. Ya Ya, what else in new. The results came out well though. The solar is working and I've seen it feeding 400w to the MTTP charger in direct Arizona sun. It should give us enough for our basic needs including the new Nova Kool refrigerator. Well, unless it's raining or we're in the deep dark woods.
I hope this is somewhat informative. The solar, in itself, has been quite a journey. Thanks for coming along.