First Cue - Handle
The handle extends from the A-joint to the butt cap. A tenon is cut on the lower end for rings, butt sleeve and butt cap. This tenon is long enough to accept rings, butt sleeve, and extend into the butt cap. Small radial and lateral cuts are made to the tenon to aid in bonding.
Butt Sleeve
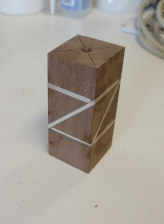
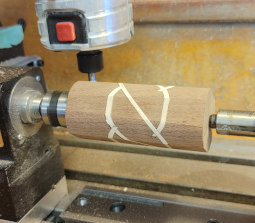
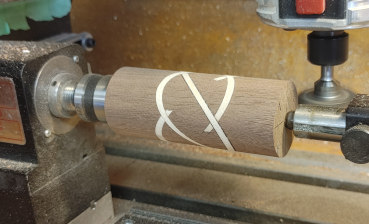
The butt sleeve was made of walnut. I wanted some decoration on this and started looking around the Internet and stumbled on a "Celtic knot" used by pen makers. There are several, if not many, tutorials of this for pens. Though basically, starting with a square block, slots are cut 45 degrees off axis nearly through. Each slot is filled in turn by gluing a contrasting material (I used a veneer layup). In my case I used 5 minute epoxy. After one slot is filled the block is sanded square again. This is repeated for each of the four faces. The resulting blank isn't impressive but after turning down to a round cylinder I find it pleasing. Below is the process on a test blank, I don't have pics of the piece for the cue. The gaps seen in the third picture are left from cutting, on the table saw, nearly through. The "nearly" part is still showing. A little further cutting will machine away these blanks portions.
 |
 |
 |
Once machined round, about 0.035" oversize, it was taken to the lathe and bored through to fit the tenon.
Assembly
The rings and butt sleeve were bonded onto the handle. The butt cap was left off so the drilled center was retained. It was pressed together using the lathe tail stock with some plastic bags for "mold release".
At this point the handle is ready to be joined to the forearm.
Cue #1 : Main Joints